Trying Vuforia with Android Studio 2020 edition!

Yeah, keeping a blog alive it’s hard and sincerely after an entire day of work and the daily training my mind is a bit too fuzzy to just think be able to write something decent to post …
However sometime you get an incentive from outside and this could help!
Here the step by step updated guide on how to try Vuforia samples in Android Studio, it’s pretty simple, enjoy!

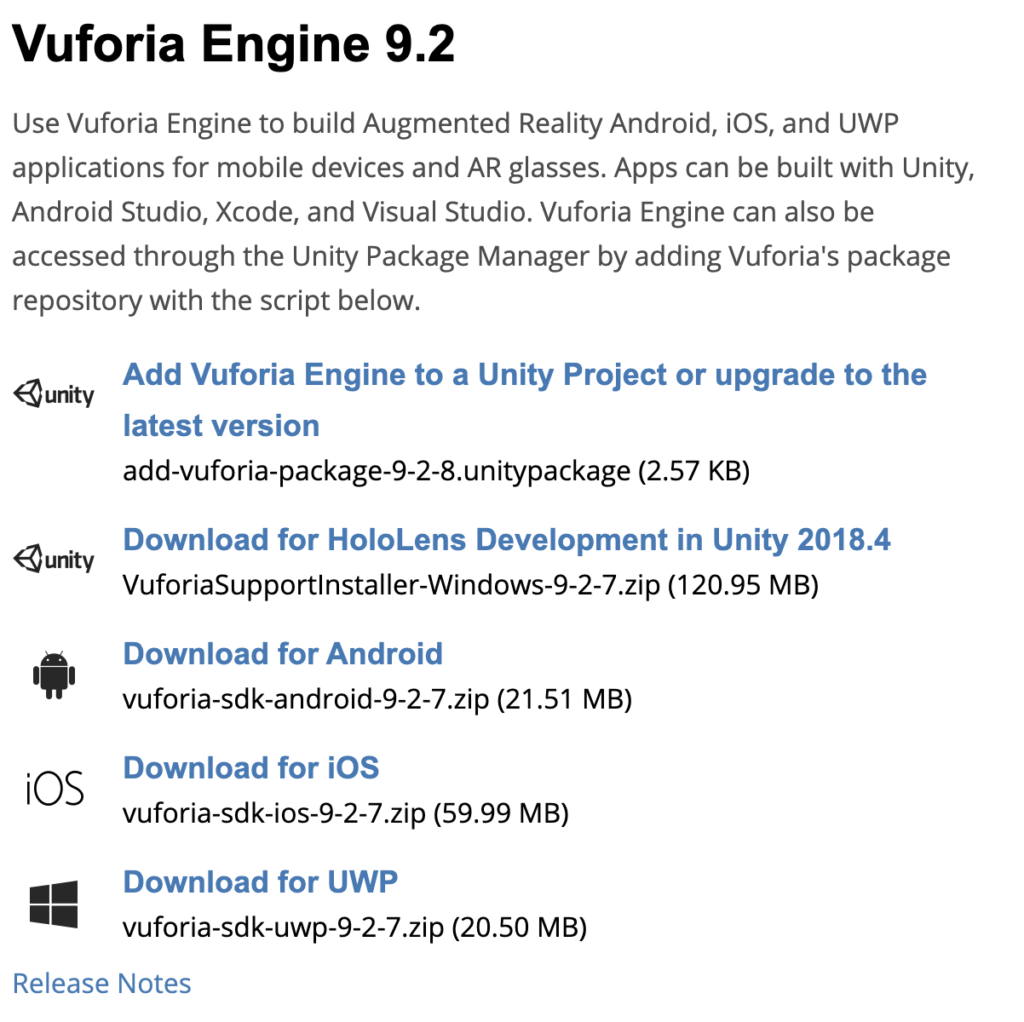
First of all you need to download the Vuforia Engine for Android, you can find it here: https://developer.vuforia.com/downloads/sdk

You need to create a Vuforia developer account to do so, don’t worry it’s free 😉
After that you should have saved a zip file with a name similar to vuforia-sdk-android-x-y-z.zip
Unzip the sdk file and locate the samples folder, there you should place the Android Vuforia Samples that can be downloaded here: https://developer.vuforia.com/downloads/samples
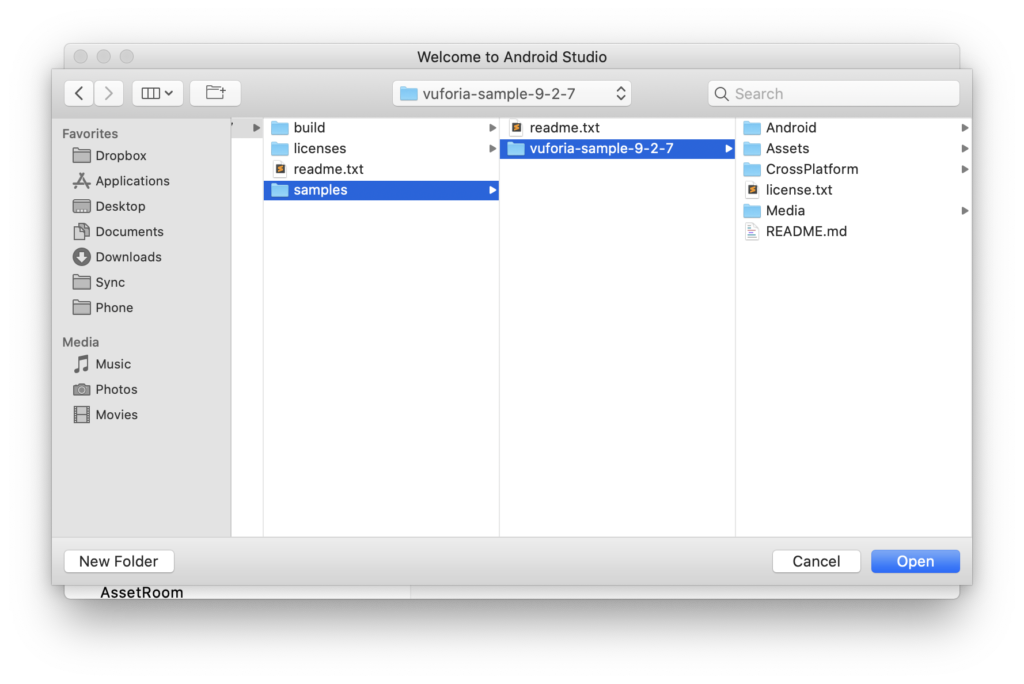
Unzip the samples files and place the entire directory vuforia-sample-x-y-z in the the samples folder previously empty


Now it’s time to use Android Studio and open the samples project, from AS select Open Project and open the Android folder in the samples
There are few requirements to be able to build the project: Android|Android Studio 3.6, Optional: Gradle (for command line builds). You will need to install the Android ‘SDK Tools’ ‘CMake’ package version 3.10.2.x|
If during the building you get the following message CMake '3.10.2' was not found in PATH or by cmake.dir property just install CMake 😉


If everything is okay you should be able to build the application, so plug your device and run it 🙂


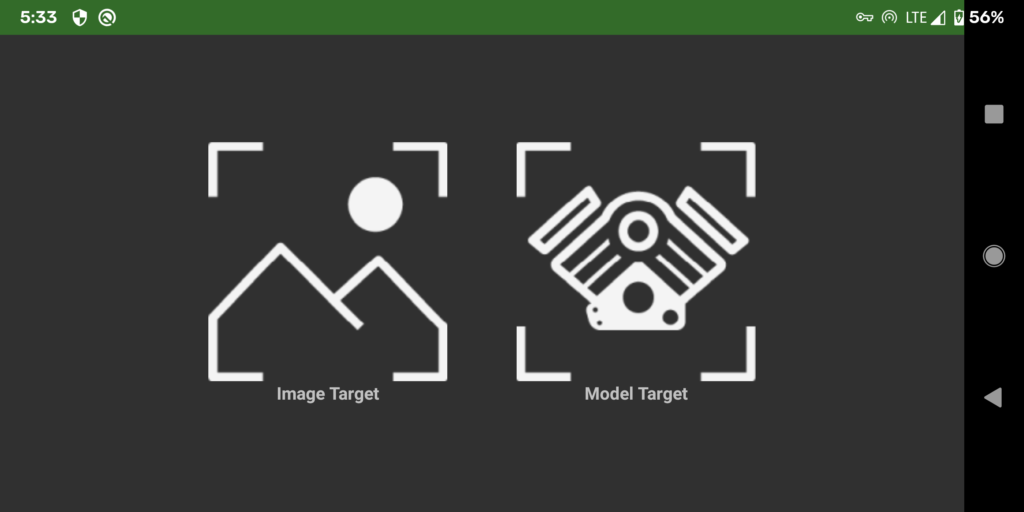
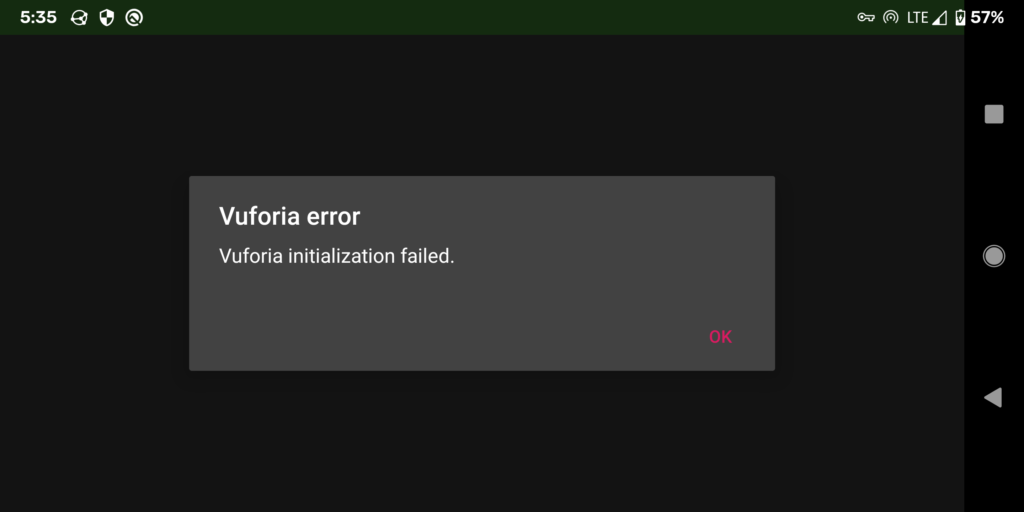
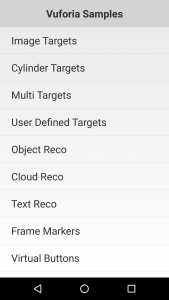
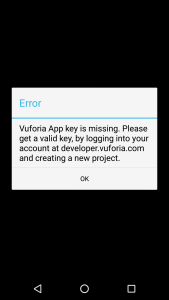
Here the first screen displayed from the app, let’s try to pick Image Target …. urgh something is wrong!


The reason is that we have to add license key, so first of all let create a License key!
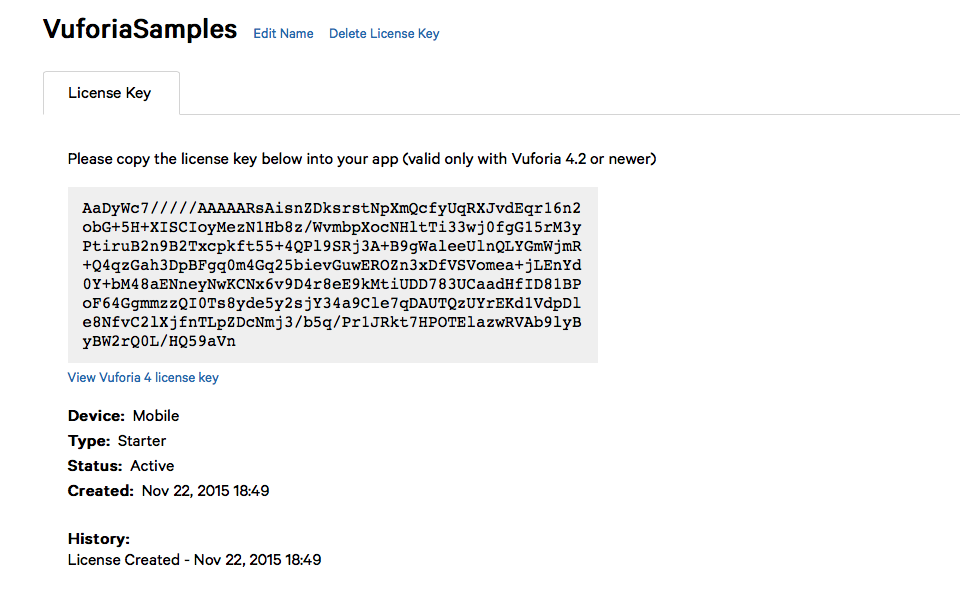
To generate a Development key, one key you can use for testing and develop, we need to go to the License Manager section: https://developer.vuforia.com/vui/develop/licenses

Click on Get Development Key and add a testing name for your license (you can generate several of them to use in different projects), accept the conditions and generate one.


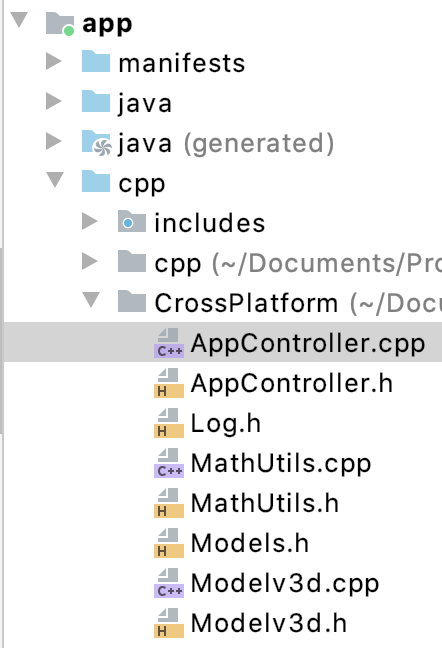
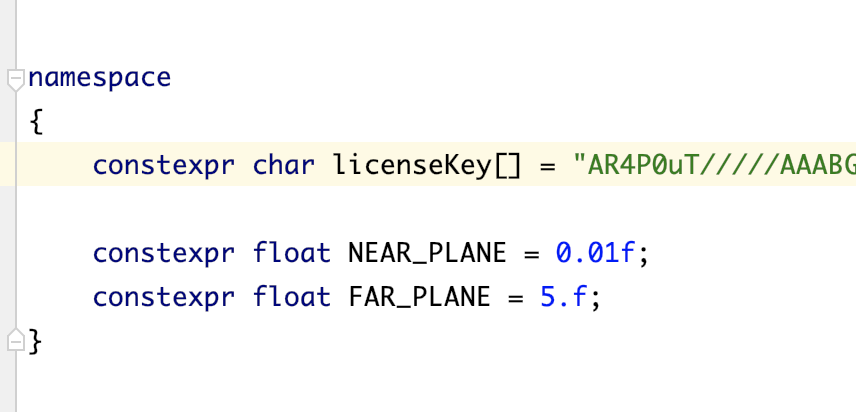
Now it’s finally time to copy and paste the license in your testing project, click on the license you’ve generated and copy it in the source file CrossPlatform/AppController.cpp in
the licenseKey array variable


Good now we should be able to go, build the app again 🙂
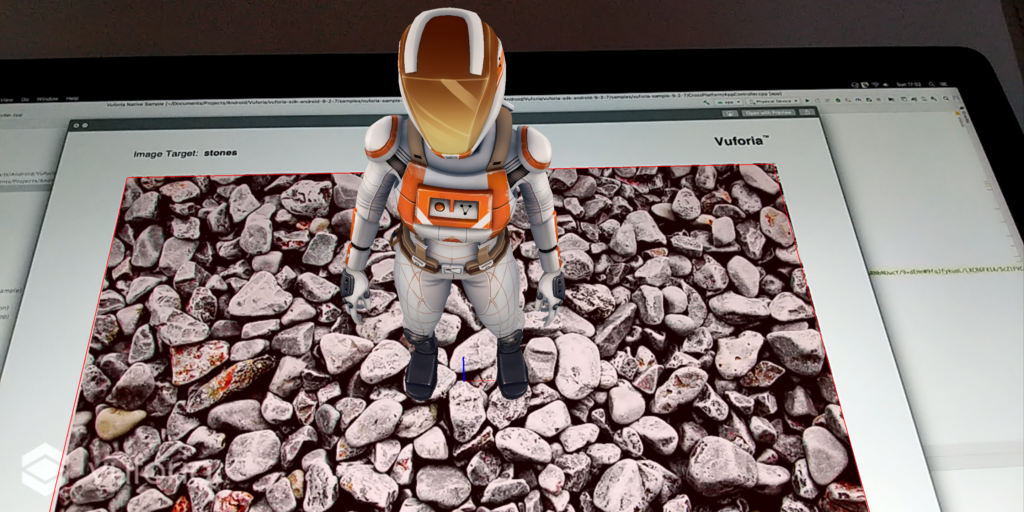
To test the samples you can use the target images presents in the Media folder under the vuforia-sample-x-y-z

And as always, happy coding!

Android GeckoView compiling How-To

Ok you want to use a WebView in your Android App… I express my concerns about webviews-abuse before in particular cause respect to other Android libraries you don’t have absolutely any control on that and when shit happens the only thing you can do is report the issue and wait that the Google God release and update with a fix.

What if you can integrate another webview engine, something that at least you have more control on and that could be more powerful than the Android one, well good news a solution exists and is called GeckoView!!

I will write more about this project but for now I want to start in a bit different way, indeed I want to discuss on how to build it from source cause this ultimately this means have control right?

The documentation reported in the former website is pretty good, following is just my personal steps 🙂

As a side node all the steps reported here refers to a Mac Os environment but in essence is exactly the same on every os

Get set up with Mozilla Central

First thing is setup the repo, Mozilla doesn’t use Git as source version system but Mercurlial, so let’s start installing Mercurial

brew install mercurial

Check that Mercurial has been successfully installed

hg --version

Install git cinnabar for users that know git and not mercurial

brew install git-cinnabar

initialize an empty git repository

git init gecko && cd gecko

now let’s configure Git

git config fetch.prune true
git config push.default upstream

Add remotes for your repositories. There are several to choose from, central, inbound, beta, release etc. but in reality, if you plan on using Phabricator, which is Firefox’s preferred patch submission system, you only need to set up central. It might be advisable to have access to inbound however, if you want to work on a version of Firefox that is queued for release. This guide will be focussed on Phabricator.

git remote add central hg::https://hg.mozilla.org/mozilla-central -t branches/default/tip
git remote add inbound hg::https://hg.mozilla.org/integration/mozilla-inbound -t branches/default/tip
git remote set-url --push central hg::ssh://hg.mozilla.org/mozilla-central
git remote set-url --push inbound hg::ssh://hg.mozilla.org/integration/mozilla-inbound

Expose the branch tip to get quick access with some easy names.

git config remote.central.fetch +refs/heads/branches/default/tip:refs/remotes/central/default

Setup a remote for the try server.

git remote add try hg::https://hg.mozilla.org/try
git config remote.try.skipDefaultUpdate true
git remote set-url --push try hg::ssh://hg.mozilla.org/try
git config remote.try.push +HEAD:refs/heads/branches/default/tip

Now update all the remotes

git remote update

Bootstrap Gecko

Ensure you have mozilla-central checked out. If this is the first time you are doing this, it may take some time.

git checkout central/default

If you are on a mac, you will need to have the Xcode build tools installed. You can do this by either installing Xcode or installing only the tools from the command line by running xcode-select –install and following the on screen instructions.

I had to install the entire Xcode suite and after that also defined the Xcode path

sudo xcode-select  --switch /Applications/Xcode.app

Use the –no-interactive argument to automatically accept any license agreements.
In my case the option -no-interactive was not working properly so I did

./mach bootstrap

I replied yes to everything except to build the system telemetry

At the end I created a mozconfig file and paste the following content into it

#Build GeckoView/Firefox for Android:
ac_add_options --enable-application=mobile/android
#Targeting the following architecture.
#For regular phones, no --target is needed.
#For x86 emulators (and x86 devices, which are uncommon):
#ac_add_options --target=i686
#For newer phones.
#ac_add_options --target=aarch64
#For x86_64 emulators (and x86_64 devices, which are even less common):
ac_add_options --target=x86_64

As you can see from the mozconfig file I enabled the aarch64

Now it’s time to configure your build.

./mach configure

I got an error:

The target may be unsupported, or you may not have
0:08.33 a rust std library for that target installed. Try:
0:08.33 rustup target add aarch64-linux-android

First of all need to install rustup

curl --proto '=https' --tlsv1.2 -sSf https://sh.rustup.rs | sh

And after that to configure the current shell to use rustup

source $HOME/.cargo/env

Finally I can do

rustup target add aarch64-linux-android

and then

./mach build

And now let’s go for a run … 😉

Finally after that, if everything went well, we can run

./mach package 

Congrats you’ve successfully built GeckoView!!

And for Android Studio?

Pretty easy, just open AS and disable the Instant Run (from the preferences), This is because Fennec and the Geckoview Example app cannot deploy with Instant Run on.

Uncheck the box that reads Enable Instant Run to hot swap code/resource changes on deploy.

Now select Open and pick the root directory that contains the gecko files (the initial folder named gecko)

Wait for the project to index and gradle to sync. Once synced, the workspace will reconfigure to display the different projects.

  • annotations contains custom annotations used inside GeckoView and Fennec.
  • app is Fennec – Firefox for Android. Here is where you will find code specific to that app.
  • geckoview is the GeckoView project. Here is all the Java files related to GeckoView
  • geckoview_example is an example browser built using GeckoView.
  • omnijar contains the parts of Gecko and GeckoView that are not written in Java or Kotlin
  • thirdparty contains third party code that Fennec and GeckoView use.

And now you’re ready to get your hands dirty!!
WebView blank page issue on Chrome 75 and above? Check that the MIME type is not NULL!

Again just want to report a silent change that has been deployed on the Android WebView component starting from the 75 version.
If by any chance are you using a WebResourceResponse you could use the following constructor

public WebResourceResponse(String mimeType, String encoding, InputStream data)

or

public WebResourceResponse(String mimeType, String encoding, int statusCode, @NonNull String reasonPhrase, Map responseHeaders, InputStream data)

Please be sure that if the data input stream has a mime type, the corresponding mime type is passed during the creation.

This cause according to the WebView team

WebView team's expectation is still for apps to specify valid MIME types, and we do not explicitly support null MIME types

If you pass a null mime type a blank page is displayed.

It’s a pity that from the logs there was any warning about this, indeed for the previous WebView versions the MIME type was inferred from the stream but with the latest updates this is not valid anymore, I agree that passing a null value is not a good idea but still I’d rather have some warning about this instead of opening a support ticket and wait to find out what’s happening …

You can check some issues related:

https://bugs.chromium.org/p/chromium/issues/detail?id=985491
https://bugs.chromium.org/p/chromium/issues/detail?id=986113

Some WebView thoughts …

Every time I had to use a WebView in an a native App I ask myself if that is extremely necessary and which kind of advantages
using it brings in, some questions come immediately into my mind like:

  • Is this WebView gonna load and external url or html code stored on the device?
  • Is gonna use Javashit? (ops I mean Javascript)
  • Is that WebView an important section of the app, something the user is gonna see and interact with often ?
  • Is the html content updated often?
  • Is the html content made in a proper way to used on a smartphone?
  • Can we replace the WebView with a native screen ui/logic?

Why all these questions, well for start the WebView is a powerful component but it’s pretty easy to overuse it in an app particurarly
if the main screen of your app is based on that cause let’s get it clear here:

Ux/UI experience provided through WebView feel most of the time clunky, user perceive them as something extraneous from the rest of the app different, and this break the flow

Yes, there’re guides and best practices out there for this (https://developer.android.com/guide/webapps/) , but let be honest, average user notice the difference!

As you know starting from Android 5.0 Google decided to separate the WebView from the core operating system, this was a smart move cause it was possible to deliver security fixes and improvements
to old and new devices including the ones that couldn’t support new Os versions.

Now a funny thing, have you notice how often the Android Systen WebView is updated?
More often than you think, in average, according to my latest monitoring, every 3.5 weeks.
That’s cool right? Yes definitely but as every developer know pretty well, lot of updates mean also lot of potential new bugs … right? 🙂

Sure, you can take a look at them here:

https://bugs.chromium.org/p/chromium/issues/list?can=2&q=os=Android&colspec=ID%20Pri%20M%20Stars%20ReleaseBlock%20Component%20Status%20Owner%20Summary%20OS%20Modified

And what if one if this bug happens randomly and corrupts the WebView component in a way that every web page loading is failing resulting in a blank page?
What if the only temporary way to get rid of this is uninstall the app and re-install it again until eventually the issue happens again?
Guess what? This happened some time ago with the release of the major 75 version … and the bug is apparently still there.

If you think that the WebView is a stable component well you better think twice …

My Barrathon

Take a little island of 60 square kilometers, just one main road runs around the coast, surrounded by the ocean and with an estimated population of 1174 people.
I decided to go there.
I decided to go there and run .
Reaching Barra is not so difficult but the time the travel takes can vary a lot based on the transport you decide to take.
You can reach Barra in two ways:
– by the ferryboat, starting from Oban
– by plane, yes Barra has an airport, more precisely, has the only airport in Europe where you land on the beach.
Initially I planned to take the airplane starting from Glasgow, just after the Droidcon in London, but I was too incautious expecting that would be easy to find a seat at the last moment, apparently it’s not, so I opted out for the ferry boat.
I spent the night in Glasgow and early in the morning took the train for Oban and there the ferry boat for Castlebay, the main village on the island.
I reached the island around 8PM, the ferry needs about 5 hours, the flight just 45 min, nonetheless I get the privilege to see some beautiful scenarios during the travel, I don’t regret it at all!


October is not the best month if you want to visit Scotland, why the hell did you go in the Hebrides ?
This is the kind of question most of my friends ask me, to be honest I think was a great month and moment to go, few travelers, best price for the accommodation and the pleasure to run alone without meeting anyone for hours, just me, cradled by the run, immerse into raw lands.
Everyone can have several reasons for going into a specific place, don’t leave the people change your mindset, if you want it, if you feel that’s the right thing to do, you have to do it.
I stayed at the Castlebay Hotel (my room had a perfect visual of Kisimul castle) , I booked for 3 nights but suddenly I extended that to 5 nights without problem (another advantage related to the low season).


Until two months ago I didn’t know anything about Barra, one night I was reading a book entitled “Correre nei luoghi piu’ belli del mondo” and Barra was among them, every year in June there’s a competition called Barrathon, a half marathon around the island, almost immediately I knew that would be a very nice race to do but then I thought “why don’t spend some days there, why just go for a halfmarathon when you can go and run how much you want, on the same track without the pressure of a competition?” Ten seconds after I made up my decision, every day after the breakfast I would have run on the island not only on the main road, I would have run heading towards any place I’d find interesting to explore without a specific reason, just cause I’d want to go there.
That was my only plan.


Every day I went out from the Castlebay Hotel with my backpack, some water, something to eat and no care about the weather or the wind or the cold, with only the pleasure to explore.
Usually I started to run on the main road but when I saw a beach or a strange rock on a peak or a little building I just deviate taking another direction and on Barra this is very easy cause there’s almost any place you cannot reach.

In the mid afternoon usually I was back at the hotel, after a good shower and half an hour rest I went out for a tea break in the near cafeteria where I tasted some of the best cakes I ever tried 🙂
The rest of the afternoon, just a bit of walking and reading until dinner time when the restaurant in the hotel give me some tough times but in a good way, delicious meals, was not able to contain myself 😀
I made an average of 28 km a day running, but this is not the point, the point is that there were some moments where the time stopped, around you there’s nothing besides the sea, the wind is blowing and the sea speaks to yourself and you’re truly happy just because you are there, you are living.
Thank you Barra, I’ll bring you always with me.

Droidcon London 2017

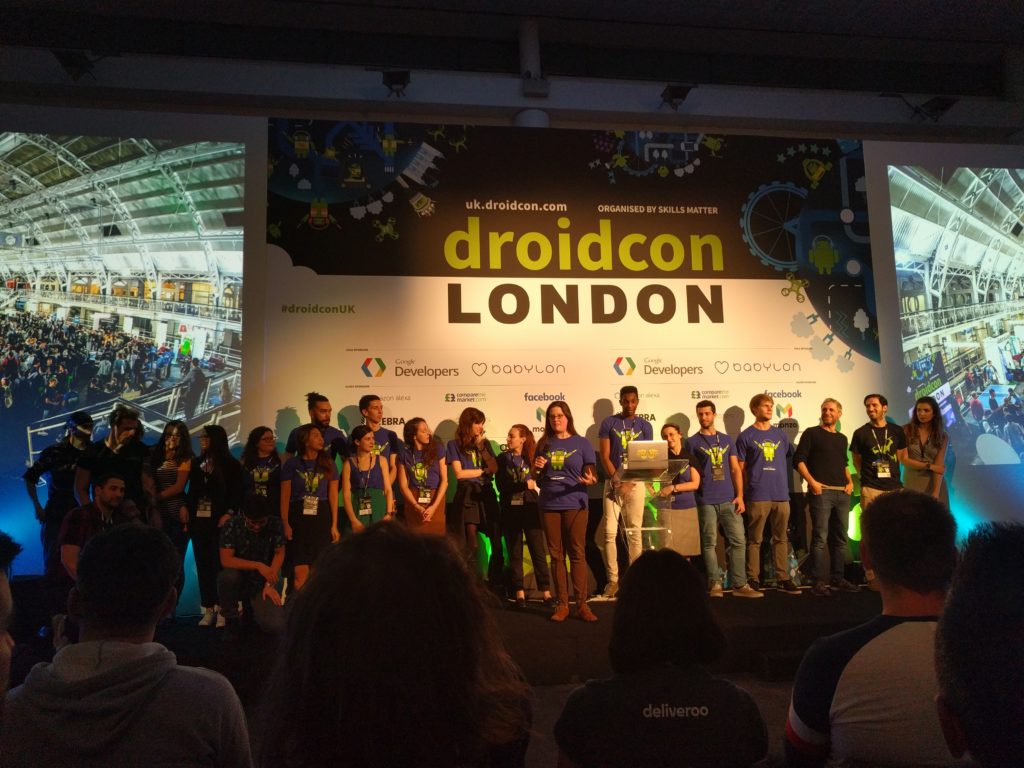
droidcon

This is my first Droidcon in London, before I had been at Droidcon in Italy so I feel safe to say that this one is probably the most famous/important android conference that I attended so far … but the real question is, does it worth it?

Now keep in mind that this is just a personal opinion, so there’s no absolute truth in it, experience may vary from person to person overall there are some points that are undoubtedly, unquestionable facts, ergo there’s anything to argue about them, cause they are well … facts 🙂

Let’s start to examine every single main aspects starting from

Location
London, a pulsing heart at 180 bpm for 365 days per year, as soon as you reach Victoria Station (I landed in London Gatwick airport) you feel it immediately, you cannot go upstream, you just have to abandon yourself and let the city embrace you with all the vibrant lights, people, traffic, shops and smells, you can try to just focus on one thing at the time but the amount of stimulation you get is so massive that is almost impossible to dissect every single aspect, you simply can’t, your brain is overflowed!
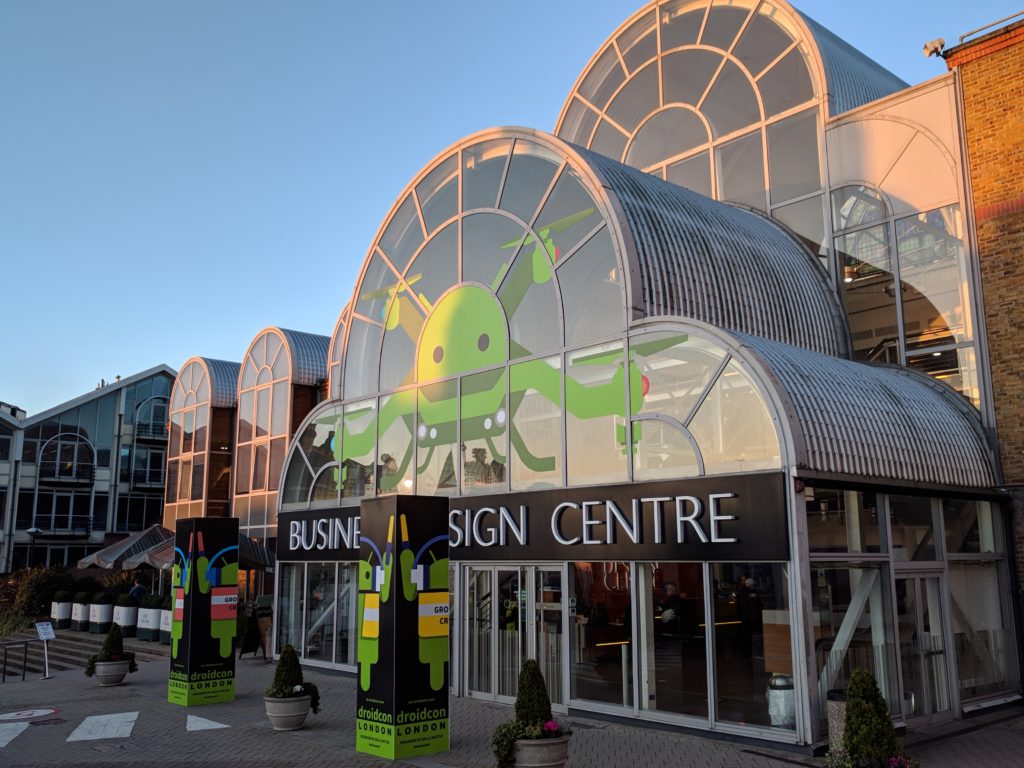
The conference is hosted in the Business Design Center, a very big place but not huge, I decided to reach it by walk from Victoria station (about 5 miles) cause the route allowed me to appreciate more slowly London 🙂
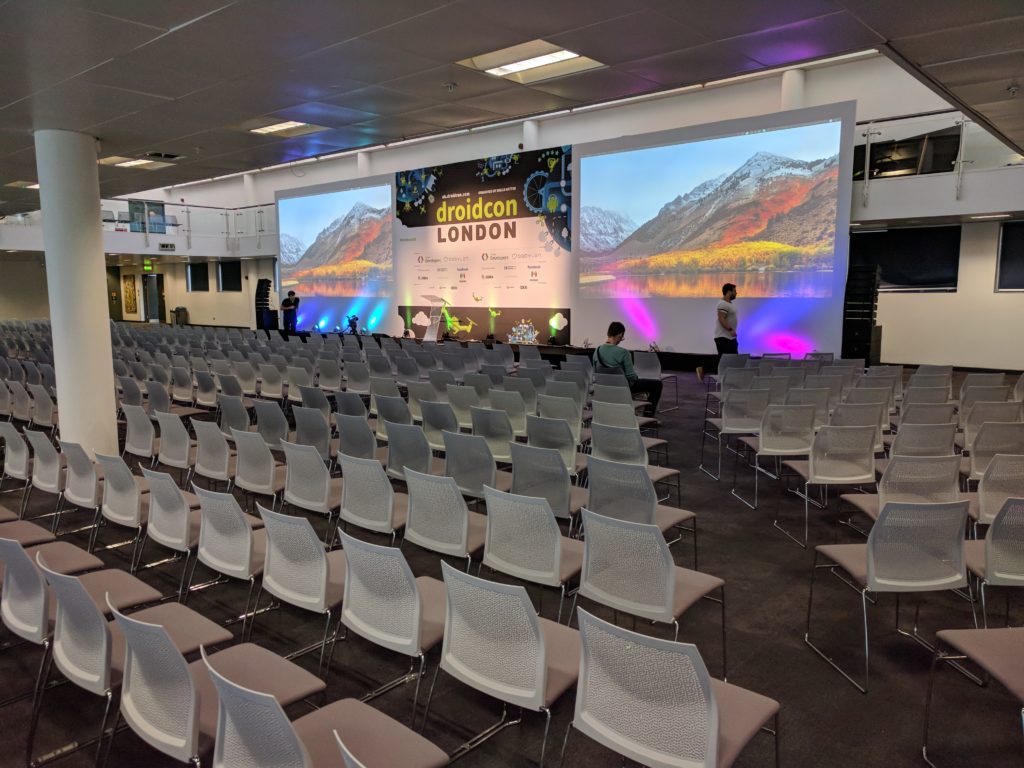
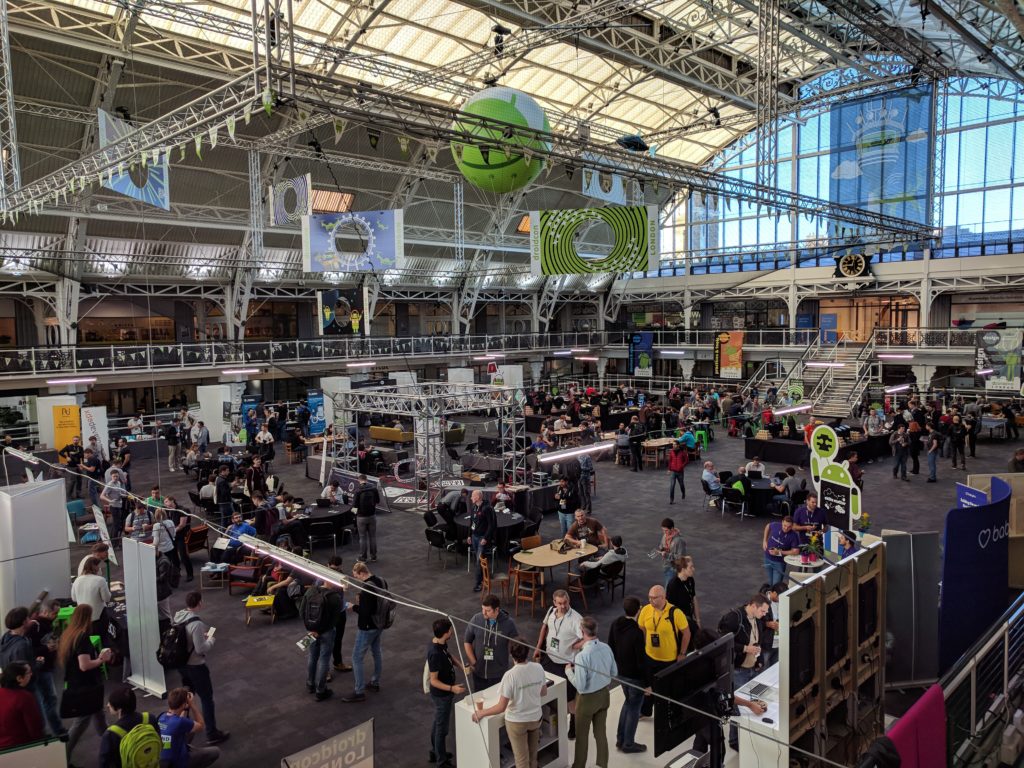
The BDC as far has I seen isn’t just used to host only conferences but is also a permanent place for some offices/shops/studio/whatever, for the Droidcon there was 5 rooms (gates) with decreasing space starting from the biggest one, the G1.


The main entrance area outside has been used as a space for registration, expositors, sponsors, food area, drone area (yes you read it right) and my favourite one… ping pong tables!

Talks
The Droidcon span over 2 days (for the talks), every day has an opening keynote and a closing keynote aimed to every developer and between them you can choose whatever talk you feel more interesting, stimulating 😉
Here the talks I chose to attend:

day 1

Overall all the talks were interesting, clearly some of them impress me more but the quality was pretty high, congrats to all the speakers!!

Honourable mention
Please take 20 mins of your time to watch out the The Baddest Android Advice talk, believe me it worth it from any point of view 🙂

The first day closed officially with a party, that means music, beer and drinks, was a nice moment for talk and relax with others developers and play ping pong 🙂
A side note for the organiser (if anyone is ever going to read these lines) please bring more food!!! Developers are always hungry by definition … I’ve seen storm of people attacking anything edible 🙂

day two

Second day was pretty similar to the first one, lot of interesting talks and one in particular was so amazing, I hoped Google releases a new uber language for general purpose, something that could improve every aspect in our life, and yes Chet Haase and Romain Guy presented F.A.R.T. , please watch out the video and prepare yourself for the language of the future!

Honourable mention
The closing keynote was held by Jack Warthon a guy that doesn’t need to be presented cause he infests our .gradle library section 😉
The talk entitled “Sinking your teeth into bytecode” was not properly a light session, particularly after a 2 days non-stop, nonetheless was very interesting cause emphasise the fact that it’s always a good thing to dig a bit and find out what’s happen under the hood after the compiler generate the bytecode, I highly recommend you to take a look.

Overall organisation
Organise a congress like this it’s not an easy task, I really appreciate the work that the guys from skills matter have done, my only concern is that there was no official app for this congress and it’s a bummer cause as a developer and as user I take for granted an app for the most important android conference in EU.
An app could ease checking in which room the talk is going to be (room number changed dynamically accordingly to the interest expressed from the participants the day before) also could simplify the evaluation of a talk (why use a different coloured post-it right just outside the room)  and much more …
That said I’m sure next year will be an even better conference and some aspects will be refined and improved, I’m so sure about it that I’ve bought the ticket for the Droidcon 2018 the day after!

Final considerations
Droidcon in London is not cheap, hotels are expensive, the ticket for the conference is expensive (when is full price), the food and the travel for reach London are probably the cheapest things you’re going to have if you decide to attend.
All the videos are uploaded online one or two days after the end of the event so probably you’re wandering why spend a non indifferent amount of money for this … good question.
First of all if you plan in advance everything, all the expenses are going to be much more reasonable (e.g. the super early ticket cost 95 pounds) but I think, and I’m sure I’m not the first one writing down this, the thing you can get from any android conference and in particular from this one, is the possibility to get in touch with some of the best android developer out there, talk with them, ask questions, make relationship, find new friends, get in touch with some cool and big companies searching for developers, learn during the workshop (that I miss for another reason) and much more… all the things that a physical human relationships can give you but a virtual one cannot.
You have to establish how much this kind of thing worth, for me is priceless.
Hope this brief description could be helpful to any android developer that for a reason or another hasn’t ever participate to any Android conference around the world, in particular to this one in London, if you have questions please let me know in the meantime I hope to see you next year at the Droidcon UK 2018!

My blog is dead, long live my blog!

Ok, let’s be honest, if I take a look at the last time a post something on my blog a kind of strange mixture of feelings arise in me. At the beginning I started with the crazy ambition to write every week, just after my first post in my mind, I start to say “ok maybe not every week, let’s do it every month” … ah foolish!
I wrote only two posts, one in 2015 and one in 2016 … so yes one per year, I think is a new record in the blogsphere.
I can try to find any excuse for it, but the truth is that I had simply been afraid to write down something too stupid, or not useful at all… on top of this in the evening I’m sooooo tired, the last thing I want to do is write and on the weekend I usually train a lot (triathlon curse), try to clean my little home and if possible try to recover for the next week …. so yeah, you get the picture 😉
Two days ago was talking with a colleague of mine that he also has a blog, and he simply told me

Writing articles is easy if you are writing because you want to share something. It’s really hard if you are just writing an article because you need content.

You know what? He’s right!
Too many times I thought to prepare a cool article on android programming stuff, but too often I failed miserably cause I started from the wrong assumption that I should fill my blog with specific content.
I should fill my blog with things that I want to share, period!
My blog is dead, long live my blog!

isUserAGoat()

From Lollipop was introduced the concept of Device Owner, a sort of super-user with high privileges (not like the system root btw).
As Device Owner you can use methods in the DevicePolicyManager class to take fine-grain control of the configuration, security, and apps on managed devices.
Among the various methods you can find

addUserRestriction(ComponentName admin, String key)

that allow you to set some very interesting restrictions to your app user, for example:

- DISALLOW_ADD_USER: Specifies if a user is disallowed from adding new users and profiles
- DISALLOW_INSTALL_APPS: Specifies if a user is disallowed from installing applications.
- DISALLOW_FACTORY_RESET: Specifies if a user is disallowed from factory resetting from Settings.

… and many more…
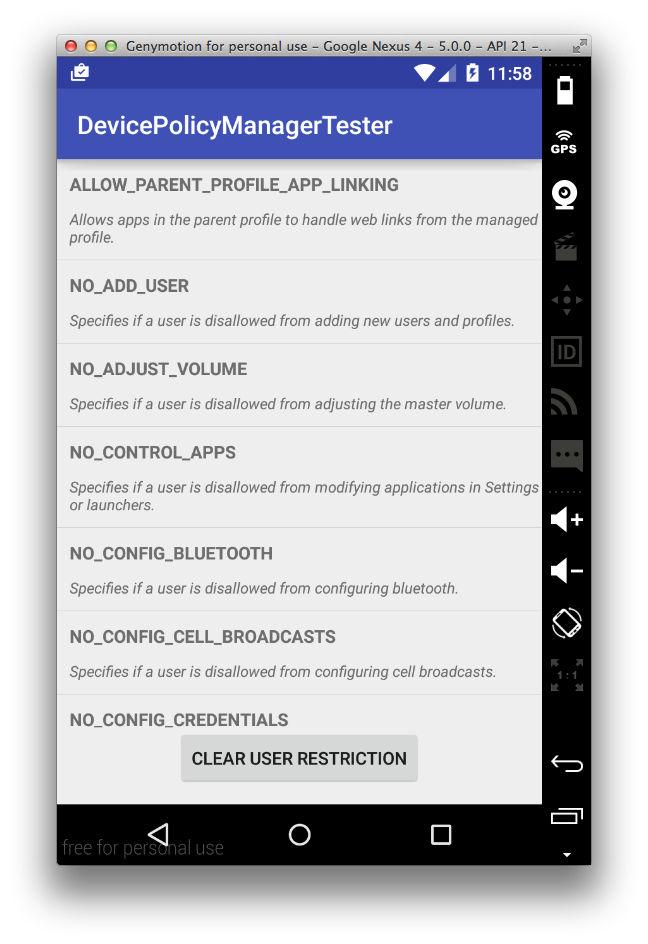
If you wanna try I’ve assembled a very simple app-example with all the User Restrictions actually available, you can find it on my github page 🙂

Screen Shot 2016-01-31 at 17.58.06
Moreover there is a restriction kinda strange on the documentation:

- DISALLOW_FUN: Specifies if the user is not allowed to have fun.

Now this mean that someway someone has defined what is “fun” on the device!!
I’m really curious about that, need to try in next days on a device with Marshmallow installed 😉
Oh right, about the post title, UserManager class give you another beautiful method:

boolean isUserAGoat()

Used to determine whether the user making this call is subject to teleportations.
Android Os … so so powerful!

ps: If you want to try the code you need to assign Device Owner privileges to the apps, for doing this you need to be sure that on the device (or simulator) there is no google account active, open a terminal and digit

adb shell

then for assigning the device owner privileges type:

dpm set-device-owner it.paolomoschini.usermanagerrestrictions/it.paolomoschini.usermanagerrestrictions.receiver.MyDeviceAdminReceiver

Trying Vuforia with Android Studio

So you have heard of Augmented Reality (AR) and all the coolness you can do with it, you wanna try right?
There are a lot of AR engines out there but one of the best you can put the “dirty” hands on is Qualcomm Vuforia.
First of all you need to create an account on the developer page, after that you can login and go to the “Download” section.

20151117_img0
As you can see the SDK is available for Android, iOS and Unity, please notice also on the submenu items “Samples” and “Tools” we’re going to use them a bit later.
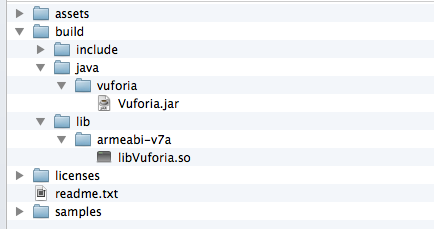
Proceed to download the SDK for Android (at the time of writing is avaible the version 5), unzip the content and take a look inside, the “build” folder is the interesting one,
infact it contains the library Vuforia.jar and the compiled engine libVuforia.so
You have seen the “Sample” directory right but it’s empty, so what?
As the readme.txt reports you need to download the examples from https://developer.vuforia.com/resources/sample-apps but the links is broken … the correct one is https://developer.vuforia.com/downloads/samples
From the above page you need to download, in the “Core Features” section, the Vuforia Sample Core for Android, check the page there are a lot of material here: Digital Eyewear examples (Google Carboard rules!), Advanced Topics, Best Practice and Vuforia Web Services.
Unzip Vuforia Samples, we’ll use the extracted folder as base for our test, open Android Studio and choose “Import project”, select the Vuforia Samples folder, set an Import Destination Directory, keeps all the import options, you have to set Vuforia.jar path edit the field with the location of Vuforia.jar contained in the SDK previously downloaded (Ex /Users/paolo/Downloads/vuforia-sdk-android-5-0-5/build/java/vuforia), click on Finish.
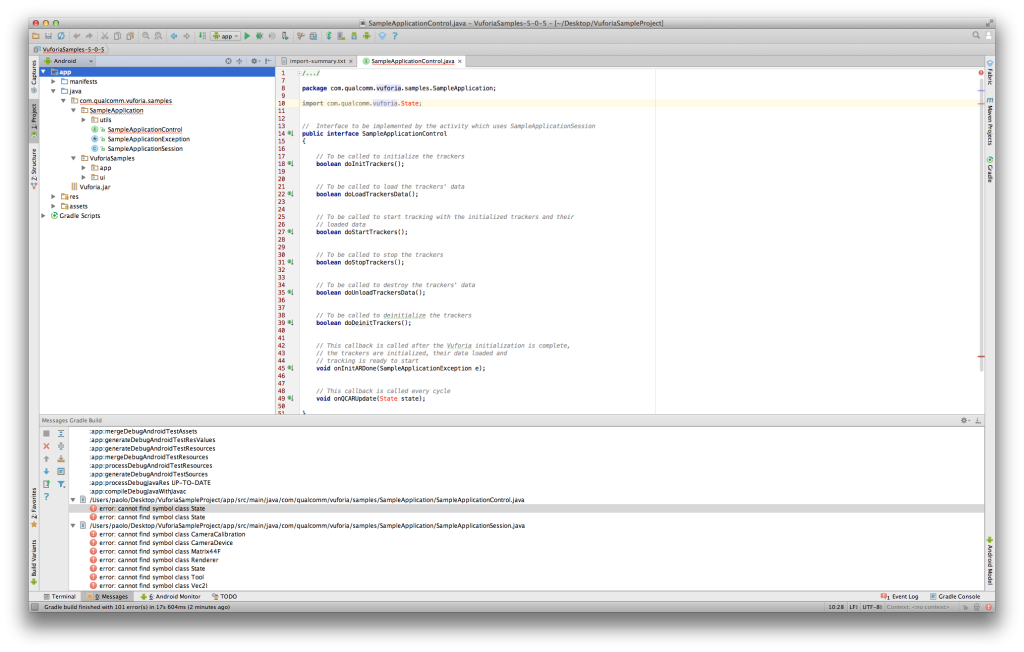
Android Studio should have imported the project, but there are a lot of errors related to unknow classes (Vuforia classes!), these because Vuforia.jar is not in the correct location.

20151117_img6
You need to create a “libs” folder in “app” folder of your project and move Vuforia.jar file from the /your_project_path/VuforiaSampleProject/app/src/main/java/Vuforia.jar to “libs” folder.
Now you need to modify your module build.gradle (not the project one!) file, add these lines at the end:

dependencies {
    compile fileTree(dir: 'libs', include: '*.jar')
}

Sync the project with gradle, voilà errors are gone!

Build and run the project on your device, you should see something like this

20151117_img1

Try selecting Image Targets … arghhh nothing happens, we have to do 2 more things 😉
Project needs also libVuforia.so, an easy way to import this file in your project is create a zip from the “lib” folder from the Vuforia SDK folder:
20151117_img2
now move lib.zip in the “libs” folder of your project (the one that contains Vuforia.jar), rename lib.zip in lib.jar, recompile and run the project, select Image Targets:
20151117_img3
Ok told you, one last effort, the vuforia App key!

Open Vuforia developer portal page, go in Develop section, and click on Add License Key button, choose a name for the license (Ex. VuforiaSamples), select “Mobile” Device and “Starter – No Charge” License Key, confirm the data, you will receive an email related to Vuforia Application License Key.
Good! Select and copy the license created
20151117_img4
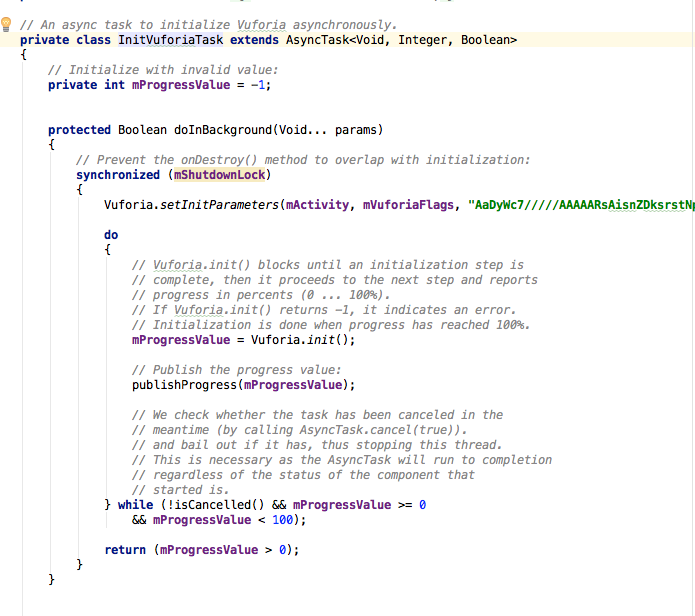
We need to paste the vuforia license in our example code, select SampleApplicationSession.java, find the inner class InitVuforiaTask, inside the method Vuforia.setInitParameters(Activity activity, int flags, String licenseKey) paste your code.

20151117_img7
Recompile & run your project, try for the last time and … fingers crossed, it works!
Ok, we need a marker (an image that is recognized from this sample, for the Image Targets we need Stones, Chips or Tarmac), all these images and others are in “media” folder inside the “Vuforia Samples“.
20151117_img5
Cool! 🙂

Final considerations
Try all the Vuforia samples, move on the advanced ones, you will find a lot to learn and to play with 🙂

Happy coding!

p.s. I’ve uploaded in my github page a Vuforia Samples project for Android studio for testing. Please remember to add the Vuforia license code 😉

0

public static void main(String[] args) {
    System.out.println("Hello World!");
}